Tuesday, 4 August 2015

CARA MASUKKAN EMOTICON DALAM CHAT COC

  Cara-caranya :

1. Pertama DOWNLOAD aplikasi keyboardnya disini.


2. kemudian pergi ke setting untuk aktifkan keyboard tersebut


3. dah selesai...

SELAMAT MENCUBA

Monday, 3 August 2015

EMULATOR UNTUK ANDROID DI KOMPUTER ANDA

Windroy Android emulator series let you run all kinds of Android Apps on PC!

Fungsi aplikasi ini adalah sama dengan Bluestack yang berada di internet sekarang. ini adalah emulator yang fungsi sama sahaja..ini boleh dikatakan alternatif untuk anda jika Bluestack anda tidak berfungsi anda boleh mencuba aplikasi ini...


Windroye: based on virtualization technology, offers excellent App compatibilty, with Android version 4.4.2. The first choice of gamers!
Windroy: Android whole AOSP ported to Windows kernel, small volume,rendering best performance!
WindroyeMobile: an Android App to let you use your smart phone to control games.


SELAMAT MENCUBA SEMUA

CARA MENGGUNAKAN NAGA

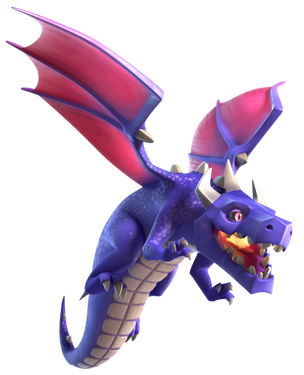
In this attack strategy you will mainly use dragons as main destructive force! This attack is great especially for low-level Town Halls!


! KEY POINT: For th7+th8, check the end of this reply for two videos with successful 100% attacks using the given army compositions from below. The two videos are available for you to watch, and also there is a full description of the attacks below the videos.

Characterization: This attack strategy is characterized mainly by brute force and often considered as simple and trivial. However, you need to do more than spamming your dragons in a single spot if you want to achieve the best out of this army composition.


Army Compositions based on Town Hall level:


Town hall 7 Town Hall 8 Town Hall 9 Town Hall 10
Army Troops 10 dragons 8 dragons+8 balloons 11 dragons 12 dragons
Clan Castle Troops 4 balloons 5 balloons 1 dragon+2 balloons 1 dragon+3 balloons
Spells 3 lightning spells 3 lightning + 1 poison 2 rage + 2 healing + 1 poison 3 rage + 2 freeze spells + 1 poison
Heroes King King King+Queen King+Queen
Destruction Targets 100% (3stars) 100%(3stars) 50% (2stars) 50% (2stars)


Note (Regarding Dark Spell Factory Spells): The dragons are units which move a lot around the base and barely stay in place. They can easily change target and move from their original spot, therefore I do not suggest using Haste Spells for them. My only suggestion for dark spells is to use the Poison Spell for the CC.
Note2: The percentages shown in the table above assume the opponent have a decent arrangements and level of the air defence units. If there is an air defence missing or they are not well upgraded for the specific TH level, then the percentages may expand and you may aim for more than the
Note3: Depending on the opponent's base, for TH7 and TH8 you may remove one dragon and exchange it for more 4 balloons.
Note4: The information given above represent my own experience with dragons over all Town hall Levels. I am currently sitting at TH10 and experienced using dragons across all 4 given TH levels.


How to attack

Town Hall 7 + Town Hall 8 - Aiming for 100% attacks

1. The first thing you need to take into consideration before deploying your dragons into battle is to decide where you will attack from. Usually in a mass dragon attack, you will need to decide a whole line where you will attack, a line which needs proper preparations for the dragons to achieve their target, the centre of the base. You can do this by deploying your hero+1 dragon/2 dragons. After you decided the side you will attack from, deploy your hero, in one edge of the line, the other edge being covered by a dragon. By doing this, you will leave some buildings in the middle, but will secure the path for the dragons to the central area.


In the example above, two dragons were deployed to form a path for the rest of the army into the central core. If you do this successfully then your second star is assured.

2. After you made a clear path for the dragons to the middle, it is up for your spells and CC to get into action.
Case A: If you chose to bring rage+healing spells, then you will deploy your CC troops(balloons) from behind your army of dragons. This will assure that the balloons will get in the centre up until the deepest air defence structure. Using the help of the spells too, you should have no trouble getting to the other side of the base and successfully defeat your opponent.
Case B: If you bring lightning spells, then you will use them against the air defence which is the farthest unit from the point you decided to deploy your dragons. After you used your lightning spells, you will deploy the CC troops (balloons) following 2-4 balloons of yours against another air defence unit which is closest to the side. (see the videos at the end for an example)
Note: See the end of this reply for two videos using the Case B technique successfully.

3. After you finished step 2, there is nothing else you can do than watch how the attack goes. One thing which could be left here is if you did not deploy your king yet, you can deploy it later in the attack near an Archer Tower to allow the dragons continue without being hurt. By doing this, the King will distract an Archer Tower so that it won't ruin the attack.

Town Hall 9 + Town Hall 10 - Aiming for 50% attacks

1. The first thing you need to take into consideration before deploying your dragons into battle is to decide where you will attack from. Usually in a mass dragon attack, you will need to decide a whole line where you will attack, a line which needs proper preparations for the dragons to achieve their target, the centre of the base. You can do this by deploying your heroes/2 dragons. After you decided the side you will attack from, deploy your heroes, one in each edge of the line. By doing this, you will leave some buildings in the middle, but will secure the path for the dragons to the central area.


In the example above, two dragons were deployed to form a path for the rest of the army into the central core. If you do this successfully then your second star is assured.

2. After you cleared the path for the dragons to the central core, you can start to deploy all your dragons in the middle of the line you picked, followed by the CC troops (dragon+balloon). Once you did this, you can drop one rage spell right at the first set of walls, followed by a healing spell in front of it.

3. After you finished with step 2, all is left is to drop the second rage and the healing spell for the dragons that managed to get into the central core, to assure the destruction of the TH.


How to deal with the CC troops

There are two options which you can choose from related to dealing with the CC troops.

1. Ignore them. The dragons, with their splash damage, can deal with the CC troops quite easily.
2. Deal with them by using one of your heroes or 2-3 balloons to drag them out. After you dragged them out of the CC, you can deploy a dragon at the side and then the rest to support the first one.
SUGGESTION: If you are using Lightning spells as your main spell composition (th7+th8), then you might want to lure the CC troops in a way so that when you drop your Lightning Spells onto the Air Defence, the spells will destroy both the air defence and the troops. See the VIDEOS at the end of this reply for this technique.
3. BEST: Use the poison spell to kill the CC. Always predict the path of the CC troops and place the Poison spell in front of them, predicting where they will stop!


VIDEOS: Detailed technique for TH7 + TH8 Dragon attacks:
The army composition used in both the videos is as follows:
-8 dragons(level 3)
-8 balloons(level 5)
-Barbarian King(level 7)
-CC troops - 5 balloons(level 6)
-3 lightning spells (level 5)

VIDEO 1


Analysis of the video 1:
1.
3 balloons are deployed to drag the CC troops out of the castle. The Balloons are dropped against an Air Defence to minimize the amount of defences against dragons while also dealing with the CC troops. (minute 00:10)
2. King is deployed in the other corner of the map to make the CC troops walk over an Air Defence. (minute 00:23)
Note: you need to pick this Air Defence in time, don't try to decide which to choose when you are already attacking
3. Patiently wait until the troops are close to the Air Defence, then when they reached the target - drop all 3 lightning spells in one time. (minute 00:27)
Note: do not wait until the troops are already on the Air defence, because there is a channelling time for the Lightning spell until it starts to zap the area.
4. While the CC troops and the defences are busy with the King, deploy one more Balloon to the Archer Tower which is distracted.(minute 00:32). If you will pay attention to this balloon in this video, it will achieve its goal and will destroy the Archer Tower from the top.
Note: A level 5 balloon will need 2 successful hits to destroy an Archer Tower.
5. With the remaining two air defences, decide which one will be destroyed by dragons and which one by the CC balloons. I picked the bottom one to be destroyed by dragons, so I started to deploy some at the bottom of the map. (minute 00:37)
6. Deploy the CC balloons against the other Air Defence. The maximum amount of buildings they can get past until reaching the air defence is 1! If the balloons need to deal with 2 defences until reaching the Air Defence, then 5 maxed balloons won't be enough to reach the target. (minute 00:46)
7. Finish deploying the rest of the dragons against the air defence which you picked. (minute 01:00)
8. The CC balloons finished clearing their Air Defence. (minute 01:05)
9. The dragons finished clearing their Air Defence. (minute 01:13)
10. Deploy the rest of the balloons nice and slow 1 by 1 or 2 by 2 against the remaining defences against air troops. (minute 01:15)
Note: In this step you will ONLY deploy the balloon(s) when the Archer Tower/Tesla started to target a Dragon. By doing this you assure the balloons will reach their target.
11. A tesla popped up near the Air Defence. DANGER for the balloons! Deploy one more balloon against the Tesla. (minute 01:20)
Note: in this step I did a mistake myself by deploying this balloon too far away from the base. This was a wasted balloon which did not reach its target.
12. Dropped the last balloon against the last Air Defence.. TOO SOON. There was no dragon to tank the attacks of the Archer Tower and as a result, the balloon was wasted. DO NOT deploy the balloon unless there is a dragon tanking the attacks. Adrenaline of the attack Aye.
13. Every troop has been deployed so now only watch how the attack goes. With 4 dragons left there were no chances that a single Archer Tower and a Wizard Tower could ruin the attack. Now is the time to breath normally again, the attack is done.
WELL DONE!


VIDEO 2


Analysis of the video 2:

1.
3 balloons are deployed to drag the CC troops out of the castle. The Balloons are dropped against an Air Defence to minimize the amount of defences against dragons while also dealing with the CC troops. (minute 00:08) - SAME TECHNIQUE AS IN VIDEO 1
2. King is deployed in the other side of the map to make the CC troops walk over an Air Defence. In this attack the king was deployed ALREADY against an Archer Tower, so no balloons needed on this side (minute 00:22)
Note: you need to pick this Air Defence in time, don't try to decide which to choose when you are already attacking
3. Patiently wait until the troops are close to the Air Defence, then when they reached the target - drop all 3 lightning spells in one time. (minute 00:25)
Note: do not wait until the troops are already on the Air defence, because there is a channelling time for the Lightning spell until it starts to zap the area.
4. Deploy few dragons against the anti air units close to the king WHILE they are distracted by the king. These dragons NEED to be deployed in the corner where an Air defence is situated. This air defence will be the one destroyed by the dragons. (minute 00:34)
5. Drop 2 balloons FIRST against the cannon from the outside, and the rest of the balloons will be dropped after it is destroyed. If you wouldn't do this, in this video example, the mass of balloons might end up going after the Wizard Tower and so avoid the Air Defence which they are supposed to destroy. (minute 00:38)
Note: In this situation, one balloon wouldn't have been enough against the cannon level 10. KNOW YOUR OPPONENTS!
6. Deploy the CC with balloons and few of yours against the Archer Tower. Now since the cannon is gone, by deploying the dragons in the spot they were deployed, there was no doubt they would go for the Archer Tower. After the Archer Tower, you need to bet which target they will go after, since both are close. (minute 01:00)
7. Deploy more dragons against the air defence they are supposed to destroy. (minute 01:03)
8. Dragons finished their Air Defence! Wohoo. (minute 01:14)
9. Balloons finished their Air Defence! x2 Wohoo! (minute 01:17)
10. Deploy the last dragon and last balloon against the farthest Air Defence left. First the dragon to tank the attacks for the balloon. (minute 01:18)
11. All the troops are deployed. Now take your coffee and enjoy the attack!
WELL DONE!


TIPS Archers

Key points to take into consideration about the all archers attack strategy:
1. Splash damage is the worst enemy of an all archers attacks.

2. Always check with few archers the possible spots where giant bombs could be placed!
3. This attack strategy is worth to use in any league; there is no league that doesn't benefit the all archers attack strategy.
4. TH10s should avoid bases with infernos set to multi, if they are closer to the edge of the base, because you will use way too many archers there. If the infernos are set to single target then you can deploy archers even if that inferno is close to the edge.
5. This attack strategy is mostly used against the abandoned bases. Don't expect too much of this strategy, the chances that you get the town hall or a 100% overall damage are pretty low.


Limits of archers/th level:
Town Hall 7: 200 archers | 20 minutes 50 seconds to fill entire army
Town Hall 8: 200 archers | 20 minutes 50 seconds to fill entire army
Town Hall 9: 220 archers | 22 minutes 55 seconds to fill entire army
Town Hall 10: 240 archers | 25 minutes to fill entire army

Army: 200/220/240 archers
Clan Castle: Archers/Wizards/Minions


Spells:
Most of the time bring ONLY Lightning spells! Bring them for:
Option 1: Mortars, for TH9 and above (below TH9 they are not so bad to use elixir on them).
Option 2: Wizard Towers, for TH9 and above (below TH9 they are not so bad to use elixir on them).
Option 3: DE Storage, for TH7 and above.
NOTE: For the additional space provided by the Dark Spell Factory, bring a Poison Spell. ONLY bring Poison Spell for the All archers attack strategy, since Earthquake and Haste spells are useless.

Notes regarding spells:
1. You may also take one rage spell with this army for your heroes, but the chances that will help you more than a lightning can are very small. It will be quite rare to use a rage spell with the archers.
2. You should never take healing spells for an all archers army, because at most Town Hall levels, the defences will kill your archers in one hit, so a healing spell is useless in this case. Bringing healing spells is often a waste of elixir.
3. You should NEVER take jump spells for an all archers army, if you find the need to break through some layer of walls, just bring few wall breakers, but don't waste the spells by bringing a jump spell.
4. You should not bring any freeze spell with this army, the chances that such a spell would be useful are very rare. A lightning spell on a builder's hut or hero spot is much more useful for a TH10.
5. Always bring for the additional space of 1 spell a Poison Spell from the Dark Spell Factory!

Rules for the attack:
1. Save up troops! You have 3 minutes for an attacks, so don't rush. Take the few outside buildings which are out of range of any defence using limited number of archers. This strategy will most of the time give you up to 10% overall damage.

2. Place few archers (4-8) in the spots where giant bombs could be placed. This will help your attack avoid a painful loss of 30 archers blown by a single trap. Most of the time if you found a giant bomb outside the base, there are more.

3. Try to lure out the CC. If you cannot reach the Clan Castle, then you might want to start your raid from the opposite side of the base and finish in the area where the clan castle is placed.
4. Look for the location of the Archer Queen. She is very dangerous against this attack strategy because she can attack over a wall, which will force your archers to attack the wall in order to get to her. This situation can end up with a lot of archers wasted just to get rid of her. If the Archer Queen is in such unfavourable location, then you might want to wait for her to walk in the opposite side of her spot and place few archers to get rid of the buildings; repeat the process until the building is destroyed.

5. Use relevant number of archers based on the building they are attacking! If you are to attack Hero spots, Builder's Huts, Army Camps, then 5 archers should be enough to take it down.

6. When you start the attack, be fast with placing the archers by surrounding the area slowly but surely. If you will take all the buildings in one time then the defensive units cannot hold up to you. If you will take the buildings one by one, you will find that you need to use more archers than you would normally use if you surround the area.


How to deploy archers. There are 2 general options for how to deploy your archers:
1. Spread your archers in a line starting from a point you decide and slowly make your way around the base.

This is my favourite way to deploy the archers in this attack strategy because when you finished to circle the base, you should have about 40-60 archers left, with which you are left to do the cleaning. If you do not have more than 35-38% at this point, you are in trouble. If needed at the end, use the lightning spells to get the extra percentage points which separate you from the 50% overall damage.

Note: When you are left with the last archers, deploy them along with your heroes to guard them, especially the Archer Queen. By doing this, 10-20 archers can take up to 6-8% by also using Queen's ability.

2. Surround the whole base with archers, using two fingers at a time. In this attack style, both fingers will each cover a corner. Deploy your archers around all the base and watch it burn. If needed, deploy the heroes in the danger zones (CC/Heroes) and at the end, use the lightning spells for some extra percentage points if needed.
Personally I don't recommend this strategy because you do not have full control over your army, as in some spots may end up with wasted archers, archers which could've been deployed better if you analysed the based instead of jumping into it.


Sunday, 2 August 2015

TOP BASE TH10

Th10 Basic But Hard Base to get 3 Star anti gowipe


Anti gowipe th10 war base 2015


Town hall 10 war base anti gowipe


War base th 10 anti gowipe


SELAMAT MENCUBA SEMUA


BASIC CARA NAK SERANG

This guide shows some basic attack strategies broken down by Town Hall level. Feel free to comment with any suggestions or ideas you might have.


TH 2 and 3

The Main Idea:


Army Composition
-- 60% Barbarians
-- 40% Archers

(Commonly called "barching")

WHY?
--It's a relatively cheap army to produce, which leaves you with plenty of elixir for upgrades.


Attacking:


Here is a sample base. The colored dots represent where troops should be deployed.

First Wave:
-- Deploy 1/2 of your barbarians by the mortar [black dot]. The mortar is the unit that will cause you the most damage, so you should take it out first.
Second Wave:

--Once the mortar has been destroyed, deploy the rest of the barbarians by the archer tower.
--Then deploy the archers by the army camps [blue dot].


General Overall Strategy:

--Attack any exposed (not enclosed by walls) defenses. Mortars have a "dead zone" around them, which is marked by the red circle.
mortar.PNG
--Use barbarians to get close to the mortar, then use archers to pick off defenses that are inside walls. (In the example, this would be the cannons).
--Once all the defenses have been destroyed, your troops can easily take over the rest of the enemy village.

Note: Some players place buildings in the corners. To remedy this, I usually deploy one barbarian to that specific building, then follow through with the normal strategy.


TH 4

The Main Idea:

Army Composition:
(Note: This assumes that you have your army camps completely upgraded, which means that you should have 80 housing space)

Option 1:

-- 31 Barbarians
-- 20 Archers
-- 5 Giants
-- 2 Wall Breakers

Option 2:

-- 60% Barbarians
-- 40% Archers

If you are a new TH 4, or if you haven't upgraded your army camps yet, I recommend using option 2.

Attacking:


Here is a sample base.

Using Giants and Wall Breakers

The difference between attacking as a TH 4 versus a TH 2 or 3 is that you have more housing space. This means... giants and wall breakers! Now, you might be wondering: why shouldn't I use giants and wall breakers as a TH 3? Well, you do UNLOCK them at TH 3, but that doesn't mean you should use them. A good army usually has a good amount of barbarians and archers to form the second and third waves of attack, and if you use the giants then, you have to sacrifice the number of barbarians and archer that you use.

How to Deploy Giants and Wall Breakers (First Wave)

I recommend using giants and wall breakers as part of your first wave. Giants specifically target defenses, and you should deploy them near a mortar if it is near the outside of the base. But wait! What if the mortar is enclosed by walls? Then what? Well, that's where the wall breakers come in. The process:
--Deploy giants near mortar [black dot], or whatever defense you chose.
--Once the giants start attacking the walls, deploy one wall breaker. If the wall breaker doesn't break through the wall or gets killed, deploy the other wall breaker. (This is why you have two).

WHY?
- So why do you deploy the giants first?
Well, the giants serve as a "shield" for the wall breakers. Since the defenses will target the closest troop, your giants will take the fire (it's okay, they have high hit points).

Deploying Barbarians and Archers (Second and Third Waves)

Now that the mortar and/or some other defenses have been (hopefully) taken care of, you can deploy your archers and barbarians.
-- First, check to see if there are any buildings in the corners. If there are, deploy one barbarian to each of them.
--Deploy the rest of your barbarians in an arc around any buildings that aren't enclosed by walls [blue arc and blue dots]. Follow up with archers if there are A LOT of buildings (over 50% of the base).
--If you HAVE taken out the mortar, deploy your archers in CLUSTERS near the other defenses [red dot]. Archers can shot over the walls, and cannons and archer towers can only target one troop at a time.
--If you HAVEN'T taken out the mortar, deploy your archer in a LINE in front of the defenses. Since mortars deal splash damage, which is damage to all the troops in one area, a line of archers with make it so it takes longer for your troops to be wiped out.

SIDE NOTE:

Clan Castle Troops: How To Deal With Them

So how 'bout them clan castle troops?

Sometimes when you're attacking, you come across troops in the clan castle that defend your enemy's village. The troops often come out and wreak havoc on your army - oh no! Here's how to combat that:

Option 1:
--Set one troop down (barbarians work well) by the clan castle. If there are troops in the clan castle, they will come out and attack your barbarian. (If there aren't any, proceed with your normal attack plan.)
--Next, lure the clan troops away from the base by deploying barbarians farther away from the base.
--Once all the clan castle troops are out of the range of the defenses, surround them with barbarians.
NOTE: if there are air troops, for example, balloons, you will need to deploy archers instead of barbarians.

Option 2:
--If you are TH 5 or above, you have another choice.
--The first step is the same: use a barbarian to figure out if there are troops inside the clan castle.
--Then, drop a lightning spell (unlocked with level 1 spell factory) on the clan castle troops. This should take out most, if not all of them. If any troops remain, use barbarians to take care of them.

TH 5

The Main Idea:

Army Composition:
Note: This assumes that you have the maximum army size (135 housing space).

Option 1:

-- 60% Barbarians
-- 40% Archers


Option 2:
-- 54 Barbarians
-- 40 Archers
--
7 Giants
-- 3 Wall Breakers


If you are trying to get loot or trophies, I recommend using option one. If you are attacking in a clan war, or aren't going for loot or trophies, I recommend using option two.

Attacking:


First Wave:
--Deploy your giants, then wall breakers as close to the mortar as you can get [black dot]. Since wall breakers will attack the nearest enclosed wall [shown by black arrows], make sure that you don't deploy all of them at the same time.

Second Wave:
-- Deploy your archers along the elixir collectors and army camps [blue arcs].
--Back up your archer attack with about seven barbarians to each side.

Third Wave:
-- Split your remaining barbarians between the clan castle and army barracks and the gold mines [red dots].

Additional strategies / notes:

--Attacking enclosed defenses (i.e. mortars, archer towers, cannons, etc.)
--If it is on the first layer of the base (by this I mean that it is on the outside, but enclosed by walls), use the giant / wall breaker deployment strategy outlined in the TH 4 section.
-- If it is on the second+ layer of the base, you have two options.
--Use the giant / wall breaker strategy
-- Use a lightning spell first (this can damage a mortar to 1/2 or 3/4 of its hit points), then follow up with your giants and wall breakers.

Spells:

-- At TH 5, you unlock the lightning spell. My thoughts on it:

--I'm not really a huge fan, unless it involves zapping clan castle troops.
WHY?
--It cost a bit of elixir, and it doesn't really do enough damage to be "worth it" for me.
I do know that some people really like to use lightning spells, especially at lower levels. If you use them, I recommend saving them for clan wars. They help to give that little bit of extra damage you need to get more stars on an attack.

TH 6

The Main Idea:

Army Composition:
Note: This assumes that you have the maximum army size (150 housing space).

Option 1:

-- 60% Barbarians
-- 40% Archers

Option 2:
-- 50 Barbaians
-- 40 Archers
-- 8 Giants
-- 1 Healer
-- 3 Wall Breakers
--(2 Healing Spells)

Note: Spells are optional. I recommend using them in clan wars and when you find a really well-stocked base.

If you are trying to get loot or trophies, I recommend using option one. If you are attacking in a clan war, or trying to 3-star a base, I recommend using option two.

Attacking:


Alright. Attacking is going to get a bit more complicated.

First Wave:
--If I was actually attacking this base, I (obviously) wouldn't be able to see all the traps. However, since I can guess that the exposed cannon and archer tower will be guarded somehow, I can just deploy 1-3 barbarians by those two defenses [black dots] to set off any traps.

--Deploy 10 archers by the exposed archer tower.
--Deploy 1 barbarian to each builder's hut if they are in the corners.

Second Wave:
-- Deploy 2 giants near the mortar [blue dot]. Once they start to attack the wall, deploy 1-2 wall breakers as needed. When the wall has been broken, deploy two more giants.
-- (If you have healing spells and want to use them, use one now to keep your giants from getting damaged by nearby defenses).
--Deploy 10 archers along each blue line. They should be more or less out of the range of the defenses (at least at first) and you'll be able to get some resources.
--Deploy 10 archers near the air defense [black dot]. If needed, deploy 5-10 barbarians as a "meat shield". Once the air defense has been taken out, deploy your healer.

Third Wave:
-- Deploy 2 giants by the remaining mortar [red dot]. Once they start to attack the wall, deploy 1-2 wall breakers (depending on how many you have left). Once the wall has been broken, deploy 2 more giants.

Fourth Wave:
--Deploy half of your barbarians along each green line.
Note:if your troops have already destroyed all of the elixir collectors,deploy your barbarians around any exposed defenses (example: thecannon), around any buildings that are out of range of the defenses,or near any defenses whose surrounding walls have been broken down.

TH 7

The Main Idea:

Army Composition:
Note: This assumes you have the maximum army size (200 housing space)

Option One:
--60% Barbarians
-- 40% Archers
(Barbarian King)

Option Two:
-- 95 Barbarians
-- 55 Archers
--45 Goblins
(Barbarian King)

Option Three:
---50 Barbarians
-- 44 Archers
-- 12 Giants
-- 1 Healer
-- 6 Wall Breakers
-- 1 Dragon
-- (Barbarian King)
--(2 Healing Spells)
--(1 Rage Spell)

Option Four:
--10 Dragons
--(Barbarian King)
--(3 Rage Spells)

If you want to get loot, I recommend using option one (barch), or option two (gobarch). What I really like about option two is that if there are collectors surrounded by other buildings, but not enclosed by walls, the goblins will go straight for the loot whereas barbarians and archers will just attack the nearest building.
For clan wars, I recommend using option four, especially if you want to get 6 stars total. Yes, it's expensive. Yes, anyone can do a mass dragon attack. But, the thing is, it's totally worth it when your clan wins.

Attacking:

Usually, I show the example base with all the traps, but now that you're onto TH 7, it's time to up the ante. Here's a picture of the sample TH 7 base.


Okay, so here are a couple of observations. In black, I circled the places where there are most likely to be spring traps. If you use mass dragons, this won't be a problem, but if you use option three, then you'll have to keep those in mind. In gold, I circled the places where there might be a giant bomb or a hidden tesla. You can't be entirely sure which is which, or if our opponent is just trying to mess with us.

Okay, on to the actual attack.

First, I'm going to show option four, the mass dragon attack. TH 7 can have level 2 dragons, and with a mass dragon attack (especally if you have a high level dragon in your clan castle), you can defeat most TH 7s and some weak TH 8s.


First Wave:
-- When you do all-dragon attacks, you DON'T need to lure the clan castle. What you want to focus on is taking out an air defense.
--Deploy 2 or so dragons along the black curve. They should be out of range of the air defense, and once they take out the peripheral buildings (the army camps), deploy two more dragons. They should move onto attack the archer tower and cannon. At this point, they are exposed to the air defense.
--Drop a rage spell along the purple outline closest to the black line. This should give the dragons the extra "oomph" they need to destroy the air defense.

Second Wave:
--Follow the same strategy as the first wave, only along the blue line.
--Drop a rage spell along the purple outline closest to the blue line. This should give the dragons the extra "oomph" they need to destroy the air defense.
--If everything goes well, and dragon AI co-operates, you should end up with both air defenses destroyed.

Third Wave:
--You should start this wave at the same time you drop the rage spell in the second step of the second wave.
-- Drop the Barbarian King on the red dot. He will (hopefully) distract the wizard tower from your dragons, and destroy some of the peripheral buildings.

Fourth Wave:
--Deploy any remaining dragons as needed. As a note, you can deploy some of these earlier if your dragons need more support while destroying an air defense.


Okay, so here we have the same sample base.


First Wave:
--Deploy 5-10 archers along the black curve. The clan castle is hard to lure in this one, so we're going to have to sacrifice a giant.

Second Wave:
--Deploy 1 giant on the blue dot. Since he'll go straight for the wizard tower, he should lure the clan castle troops.
--Deploy ~10 archers and ~10 barbarians on the blue curve (or a little further out of range) in order to lure and take care of the clan castle troops.

Third Wave:
--Deploy 4 giants on the red dot. Once they start attacking the wall, deploy 2 wall breakers.
--Deploy the rest of your giants on the red dot once the wall has been broken.
--Drop a healing spell once your giants start attacking the wizard tower.

Fourth Wave:
--Drop 2-3 wall breakers on the red dot. If you're lucky, some of them will go inside the base to break open the compartment that the air defense is in.
--Drop another healing spell to protect your giants.
--Drop a rage spell IF your giants are struggling to take out the air defense. If they are doing okay, save it for later when you need some extra "oomph".

Fifth Wave:
--Deploy the rest of your barbarians and archers along the green curved lines. Split them up evenly and have a mix of barbarians and archers along each line.

Sixth Wave:
--Deploy your healer, Barbarian King, and your dragon on the pink dot. Cross your fingers and hope for the best!

TH 8

The Main Idea:

Army Composition:
Note: This assumes you have the maximum army size (200 housing space)

Farming Strategies:


Option One:

--60% Barbarians
-- 40% Archers
(Barbarian King)

Option Two:
-- 95 Barbarians
-- 55 Archers
--45 Goblins
(Barbarian King)

[See previous sections for information on how to use these strategies]

War Strategies:

Option One: [MASS DRAGONS]
--10 dragons
--Barbarian King
-- +1 drag in clan castle and 5 archers or a balloon
--All rage or 2 rage/1 heal

A note on spells: Some people prefer to use three lightning spells to take out one of the air defenses. While this strategy works well at TH 7, you can sometimes run into problems at TH 8.

Option Two: [DRAGLOON]
--10 dragons
--Barbarian King
--Max loons in clan castle
--All rage or 2 rage/1 heal

Couple of side notes -- don't use all lightning spells with dragloon. The troops tend to lose momentum / get chewed up by the AD. Another note on the army comp is that you can substitute one of the drags for four loons. I don't usually do this, but if that's what you want to do, that's okay. Just make sure your loons are level 5.

Option Three: [HOGS]
-- 32 hogs
--10 minions
--12 archers
--8 barbarians
--Barbarian King
--3 heal spells
--Wizards and archers in clan castle

Note: you can swap the minions for wizards if you prefer.
Another note: Don't use this strategy unless you have level 4 hogs.

Option Four: [GoWiPe]
--2 golums
--3 P.E.K.K.A.s
--12 wizards
--8 wall breakers
--1 archer
--Barbarian King
--2 rage/1 heal
--P.E.K.K.A in clan castle

Attacking:

This section is a work in progress!
Mass Dragons:
Please see the TH 7 section!Dragloon:
Check out these two great videos from OneHive - they explain the dragloon strategy way better than I can with pictures. Here's part one, and here's part two.

Saturday, 1 August 2015

GOWIVA

Characterization: Despite the fact that this army is considered a Brute Force attack and spamming of troops, it actually requires quite a lot of preparation and examination to achieve the best results - GoWiVa!


The GoWiVa attack strategy is mainly used by high level players, however, it started to be used by smaller ones too. The name of this army comes from the 3 main troops which form this trio, the Golem, the Wizard and the Valkyrie. Even if the army consists mainly on these three troops, it also has other troops in smaller numbers to help achieve the best results.

Army composition:

TH8:
- 2 golems (level 2)
- 6 Valkyries (level 2)
- 8 Wall Breakers (level 5)
- 10 archers (level 5)
- 14 wizards (level 5)
- 2 giants/hogs
- CC: 3 Valkyries (level 4) + 1 archer
- 2 Rage Spell + 1 Healing Spell
TOTAL: 200 troops in camps + 25 troops in CC

TH9:
- 2 golems (level 4)
- 9 Valkyries (level 4)
- 6 Wall breakers (level 5)
- 10 archers (level 6)
- 14 wizards (level 5)
- 2 giants/hogs
- CC: 2 witches + 1 wizard + 2 archers / 3 Valkyries + 1 wizard + 2 archers
- 1 Jump Spell, 2 Rage Spells, 1 Healing Spell (note: here there are rare the chances when you can avoid brining the healing spell).
TOTAL: 220 troops in camps + 30 troops in CC

TH10:
- 2 golems (level 5)
- 13 Valkyries (level 4)
- 9 Wall breakers (level 6)
- 8 archers (level 7)
- 10 wizards (level 6)
- 2 giants/hogs
- CC: 2 witches + 1 Valkyrie + 3 archers
- 1 Jump Spell, 2 Rage Spells, 2 Freeze Spells
TOTAL: 240 troops in camps + 35 troops in CC

Let's attack!

!
The GoWiVa attack is not much different than the
GoWiPe attack strategy, in fact you will use the exact same steps as in the GoWiPe attack, just the P.E.K.K.A unit being replaced by Valkyrie.

1. The first thing you need to take care of when you attack with GoWiVa are the defender's Clan Castle troops. During a farming attack with GoWiVa there are less chances to find something dangerous or compromising for your attack; during a war attack there are all the chances to find wizard or witches in the defender's clan castle, so you MUST need to deal with them.
After you dragged the troops in a corner, you can either surround them with wizards OR you can deploy the first Golem into the battle following by some wizards and the heroes too. The Golem will head to the closest defensive structure and the troops from behind will take care of the defender's CC troops.

CASE A: You are able to lure the CC troops using one or two Giants.

Having the possibility to check the radius you can set the points where you will drag the CC troops out of the defender's castle. In the example above, a simple giant can be deployed at the bottom of the base near the Archer Tower. Usually you will need 2 Giants to get the CC troops out.

CASE B: You are able to lure the CC troops, BUT using Hog Riders instead of Giants. Two or three Hogs should be enough.

Here you will use the same principle as in the case A, you will deploy your Hog Riders and then slowly using one archer at a time you will drag the troops in a corner. Depending if the on the case, you might need 2 or 3 hogs to drag all the troops out of the castle.

CASE C: You are UNABLE to lure the CC troops out of the base, so you will HAVE to bring a Lightning Spell with you for them.

In this case you are unable to drag the troops out of the castle, not without using around 6 hog riders which will use too much of your army and might ruin the entire attack. In this situation, the best thing to do is to bring a Lightning Spell with you and use it ONLY when at least half of the CC troops are already out. DO NOT use the Lightning spell too early because you might just miss a witch or some wizards.

2. After you dealt with the CC troops, it's time to deploy the army. In the GoWiVa attack strategy, you do this by deciding a line which you want to start your attack from. After you decided your line of attack, you will drop 1 golem in each end of the line following by some wizards in behind and some 2-3 Wall breakers for each side. After just few seconds, deploy your Valkyries, Heroes, CC troops, rest of wizards and Wall breakers in the middle part of that line. By doing like this, there will be NO distraction for the heroes and the Valkyries and they will head right in the middle.


3. Right now you should have your troops in the first compartment of the base. After your troops entered the in the first compartment of the base it is time for you to drop your first Rage Spell, following the Jump Spell to connect your troops to the central area where the Town Hall is. The final part of this step is to drop your Freezing spell (if you are a th10) or your second Rage Spell (if you are a th9) in the central area to either block the defences or increase your troops power.4. Once you reached this step, you should already have obtained the star from the Town Hall. Now is the time for you to use the abilities of the heroes, if you didn't already do so, and get the most of that central enclosure. If you did not get the 50% until now, it will be up to your remaining troops to get the extra percentage points.


NOTE: Starting from late TH9 and all TH10 you will mostly aim for 50% and 2 stars using the GoWiVa attack! Do not expect too much of this attack strategy from the well developed bases.